This feature removes the possibility of registering with fake Emails and mobile numbers. Now, you can enable OTP verification for Email and Mobile during new signup on your SMPP portal. Follow the steps to set up and enable OTP Verification:
1. Configure OTP Verification
Go to Sidebar → Settings → General → Click on OTP Verification tab.
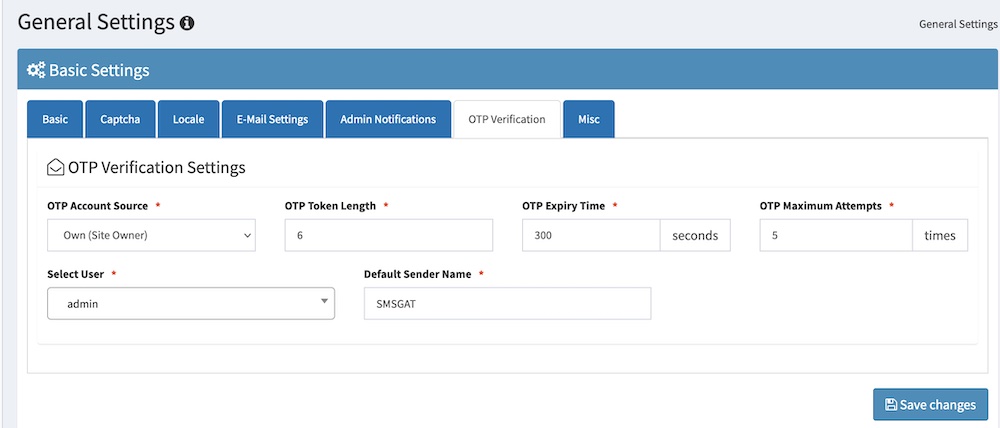
- OTP Account Source: Two options will be shown, Own (Site Owner) and Reseller Account.
- Own (Site Owner): When you select this, OTP will be used based on selected user account credentials.
- Reseller Account: When you select this option, OTP will be used of Reseller account based on pointed domain. Note: Default sender name should be set by reseller or else system will select random.
- OTP Token Length: Enter your desired token length. Recommended is 6 digits.
- OTP Expiry Time: Default is 180 seconds, but you can change as per your requirement, but do not set more than 300 seconds.
- OTP Maximum Attempts: Default value is 5. User can request for maximum 5 OTPs and if you want to change it then you can change as per your requirement. Recommended is 5 or 3.
If OTP Account source is selected with Own (Site Owner) then the following fields will display.
- Select User: Select a desired user to send OTP.
- Default Sender Name: Add the default approved sender name to send OTP.
2. Configure New Signup
Go to Sidebar → Settings → New Sign ups.
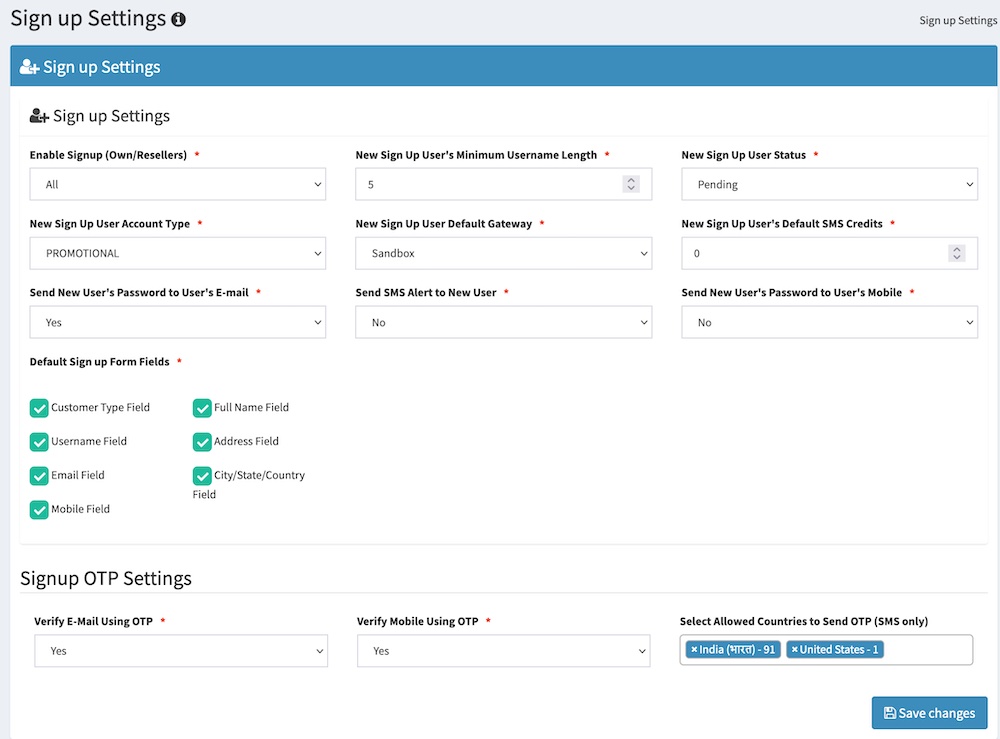
- Enable Sign up (Own/Resellers): Recommended option is All.
- Default Sign up Form Fields: Do not tick off Email Field and Mobile field.
- Verify E-Mail Using OTP: Select Yes.
- Verify Mobile Using OTP: Select Yes.
- Select Allowed Countries to Send OTP (SMS only): Select the list of countries which your SMS Gateway supports. If any user comes from different country, then mobile will not be verified.
3. Configure Alert Templates
Go to Sidebar → Settings → Alert Templates.
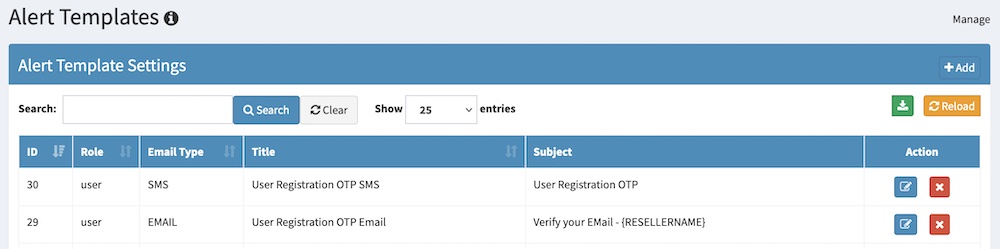
User Registration OTP Email: This is a common settings for admin sites and reseller sites. You can edit the OTP alert template as per your requirement.
User Registration OTP SMS: This setting to be used only if you have selected OTP Account Source with option Own (Site Owner). This default SMS template will be used when OTP is sent. You can edit the OTP alert template as per your requirement.
In case if you have selected Reseller Account option from OTP Account Source then follow how to set up reseller OTP SMS templates.
4. Admin Panel – Reseller OTP Template Settings
Go to Sidebar → User Management → Users.
Search for a reseller and click on Edit User. On edit user page, click on Reseller tab.
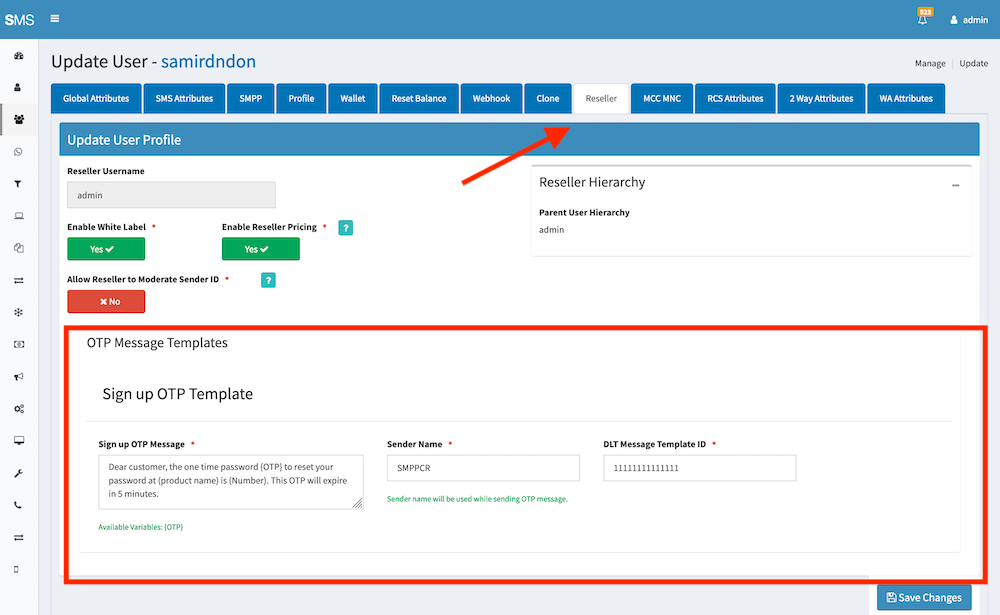
Go to Sign up OTP Template section.
- Sign up OTP Message: Add the OTP SMS content. If SMS gateway is India then you need to add DLT approved template.
- Sender Name: Add default sender name.
- DLT Message Template ID: This option will be shown only for Indian customers. Add DLT template ID.
5. Reseller Panel – OTP Template Settings
Resellers could also add the above information from user panel. Follow the steps to set up OTP template settings for New Registration.
On User panel, logged in as Reseller. Go to Sidebar → Reseller Panel → White Label → Set Theme.

Select Theme Option: Select Registration OTP Settings from drop-down.
Sign up OTP Message: Add the OTP SMS content. If SMS gateway is India then you need to add DLT approved template.
Sender Name: Add default sender name.
DLT Message Template ID: This option will be shown only for Indian customers. Add DLT template ID.
Once saved, you can go to Manage Theme and take further actions such as Edit or Delete.
Note: Reseller must have pointed a domain in order to work with OTP Verification if you have selected Reseller Account to send OTP.
